!( - )

!( - )

March 10, 2014

Coconut Banana Cookies--Gluten-free, Dairy-free


 Addition: This recipe was chosen as the featured recipe for March 18's Delicious Dish Tuesday over on lovely Alesha's blog, Full Time Mama. Big, big thanks to her! You can see that post here.

When I started my special restrictive diet a few months ago, desserts pretty much went out the window. In my quest to find anything I could have, I would find recipes that were so close to meeting my requirements, and then egg would be listed (which I can't have.)

So I then discovered that sometimes you can substitute bananas for eggs, which I have found does not always work... But for these it did!

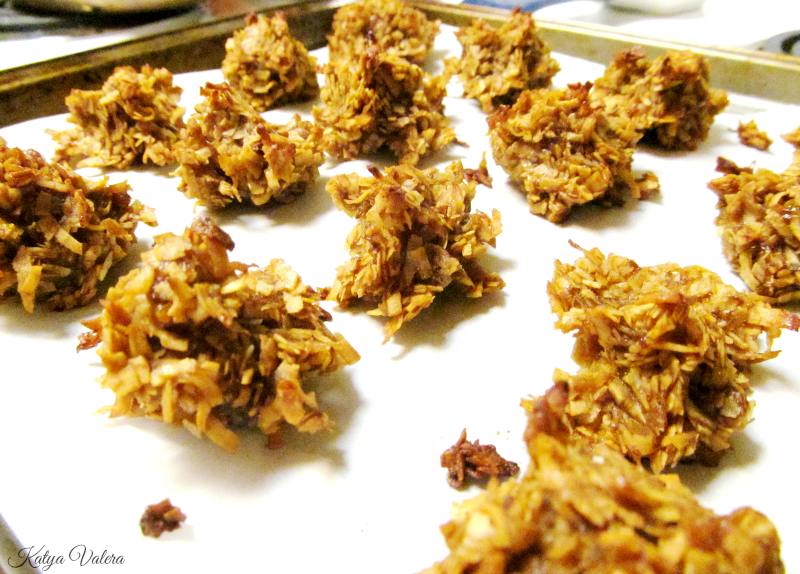
Behold: gluten-free, dairy-free, flour-free (almost everything free...) cookies! I found them through Pinterest, of course, from here. But I wanted to share my diet-friendly version.

And considering that when I made them yesterday, my dad, who is not on this diet, was waiting for them to be done, I'd say they're pretty good. ;)

Coconut Banana Cookies
(makes about 24 cookies)


You'll need:
3 cups shredded coconut
1 ripe banana (**correction: previously said 2 bananas**)
3/4 cup sugar (I use these coconut crystals)
2 tsp. vanilla
1/2 tsp. salt (I use sea salt)


1) Mash the bananas until they look kind of like applesauce. Then use a mixer to combine the bananas, coconut, sugar, vanilla, and salt.


2) Place the mixing bowl in a large saucepan filled part-way with simmering water.


3) Stir the mixture for 2-3 minutes, in which time it will turn a gooey, yummy brown. Then set it aside for up to 30 minutes so that it can soak up any liquid.


4) Preheat the oven to 350 degrees. Line a baking sheet with parchment or wax paper and then place about 1" balls of the mixture on the tray. You'll have to do some packing with your fingers since the dough contains no eggs or flour.


5) Bake for about 12 minutes or until the cookies are crispy on the edges. How "done" you want them is entirely up to you, as these cookies are certainly edible (and yummy) without being baked at all. :)


I also discovered these are pretty tasty with chocolate drizzled over them... I use the chocolate in this post.


Plus, this recipe is so handy, that it'll be making another appearance in a Make-It Monday in the near future! Enjoy!

Btw, I'm linking up this week with Delicious Dish Tuesday co-hosted by my friend Mary from over at Eat, Drink, and Be Mary! Join the fun here:

Eat Drink & Be Mary


March 7, 2014

Emerald, Almost Lipstick, and Meeting Chantilly


Loving right now:

1) This ring from Lunch Lady Vintage on Etsy (which appeared in this week's Wear-It Wednesday).


I'm not even into green but fell in love with this vintage ring, and my husband got it for me for our anniversary!

2) This "lipstick."


I am a fan of how lipstick looks but so not a fan of how it feels. My best friend recently introduced me to this after discovering that it looked good on both her and her roommate, who have totally different skin tones. So I tried it--and we couldn't believe it looks great on me too. How one shade works so wonderfully on three different skin tones is beyond me, but I'll take it! I love how this find just fell into my lap when I was wanting to find some lipstick--saved me a whole lot of trouble!

They call it "Almost Lipstick," which explains its pleasant feeling--not at all the nasty, heavy feeling that lipstick tends to give. And as dark as it looks in these pictures, it seems to really just enhance the color of your lips. (I'm wearing it in all of my recent Wear-It Wednesday posts.)

3) This lovely artist and her blog:


I found her on Bloglovin' (which I'm on, if you haven't found me there already!), and first of all, how perfect is her blog? But I got really excited when I discovered she's a singer/songwriter. I'm sorry I can't find a video of my favorite song of hers to share with you (here's her Youtube channel) but I love, love, love "Escape" and have no idea how it's not a huge hit right now--it sure is with me!

My next favorites are "What You Do To Me" and "Just the Way You Are." But I can't really stop playing "Escape" long enough to listen to those--as soon as it starts I can't help smiling. ;) Her newest EP is available, so do head over to her blog and have a listen for yourself and support this awesome artist!


March 5, 2014

Stormy Weather


The weather just can't make up its mind--3/4-length sleeves in last week's Wear-It Wednesday, and now this one was shot right before a blizzard. Yay for March!


But bigger yay for clearance skinny jeans! Yep, don't mean to brag but rather proclaim my tickled-ness with this find: they cost $2--new. :O

Shirt: Walmart
Sweater: Cato
Jeans: Roses
Boots: Cato

I cannot wait to be done with sweaters for a while. So here's hoping the rest of March's Wear-It Wednesdays start looking more like March!


March 4, 2014

Rest for Perfectionists


As a perfectionist, it's easy to agonize over ... everything. Doing things right and doing them well is fine--and that's how all things should be done. But we have to draw the line between doing our best and killing ourselves. We overachievers must give ourselves permission to relax, for our own good.


March 3, 2014

Mini Cream Cheese Sugar Cookies--Gluten-Free


This recipe has been a long time coming to my blog, and though I can't eat these cookies on my current restrictive diet, I wanted to share the recipe with you all!

I'm thinking I saw this recipe originally on Facebook--you know, one of those "share it now!" things... They were called "Meltaways," and considering that they were a complete, runny flop when I made them, the recipe is obviously intended for "glutenized" flour. They need all that glue to hold them together! No way could I drop blobs of the batter on a pan and then flatten them with the bottom of a glass, without them all turning into one giant puddle as soon as they meet the oven. (Which may be what actually happened...)

So I've come up with the cutest, tastiest gluten-free alternative! (Warning: you may eat 10 of these at a time...)

Mini Cream Cheese Sugar Cookies--Gluten-Free


You'll need:
1 cup butter
¾ cup cornstarch
¾ cup powdered sugar
1 cup gluten-free flour
A little milk

1) Preheat the oven to 350 degrees.

2) Cream the butter until it's fluffy (if you don't know how to cream butter, Youtube is very helpful with that, which may be how I know how to do it now...).

3) Mix the cornstarch and sugar into the creamed butter.

4) Beat in the flour until all is mixed well.

5) If the mixture is too dry, add a little milk (a common occurrence with gf flour).

6) Drop small portions of the batter into a mini muffin tin--about 1/3-1/2 full.

7) Bake for 25 minutes, or until golden brown.

8) Once they have cooled, ice with canned cream cheese or chocolate icing.


I actually discovered that my favorite version was when I put both chocolate and cream cheese icing on them. Ohhhh my. (I'm sorry I don't have a picture of that amazing combo.)


I tried this with a regular cupcake pan, and it took forever for them to bake, and they just didn't taste the same. The mini cupcake pan worked perfectly for containing the runny batter, and smaller portions of the batter allowed them to bake all the way through. Such cute little deliciousness!